Showing posts with label Crafts. Show all posts

Saturday, May 7, 2011

Craft Project: A Reversible Bag


Today's DIY post is actually my mom's mother's days gift!  I hope she likes it. :)

There are lots of tutorials out there for simple bags like this.  I found the most clear instructions in this tutorial by Very Purple Person.  So if my instructions aren't clear, just go look at hers.

I began by making a pattern.  I just traced one of my own reusable shopping bags and then edited it a little (made the strap longer and the body shorter).  It was just easier for me to visualize what the finished product was going to look like that way!  I didn't have any paper large enough, so I traced onto cardboard, made my changes, cut it out, then traced the cardboard pattern onto the fabric.  It worked pretty well, although the cardboard was kind of hard to cut.  For future pattern making, I think I'll try to find some butcher's paper or something.

You'll need two yards of fabric (1 yard each of two fabrics).  I chose to make one side patterned, one side solid.  That way mom can have a fun, bold bag and a more toned down bag in one. :)  Note that you'll be able to see the "inside" fabric along the strap of the bag, so make sure you pick two fabrics that look good together.  Place your pattern on the fold of your fabric and cut out four pieces (two in each color).  Darts are optional, but I think they help give the bag a nicer looking shape.  If you have good scissors, you can do what I did and just lay all four pieces together and cut the darts out at once.
Then sew in your darts, right sides together, on all four pieces.
Sew both of the matching pieces of fabric together, rights sides together, around the bottom edge of the bag (where I drew the dotted line).
And you will end up with two bags that look like this:

Turn one of these bags right side out and put it inside the other.  Make sure everything is lined up then pin the outside bag to the inside bag.
Sew the outside bag to the inside bag along the edge of the straps, but only about half way up.
Then you have to turn everything right side out through the opening in one of the straps.  It is tricky, but don't worry - it will work!  When you're finished, it should look something like this:
Sew the ends of the matching straps together.
Then press the edges of your straps under and pin.
Top stitch them together.

I ironed the body of the bag so that it would look nice.  And that's it!  You now have a nifty reversible bag!

Saturday, April 30, 2011

Craft Project: Changing Pad Clutch


So I've decided to add yet another feature to my blog: craft projects.  In addition to cooking, I LOVE to make things and I thought blogging about them would be fun!  I also plan to do my best to put together tutorials for anyone who wants to try these projects themselves.

My friend Taryn (blogger over at Mr. Jones and Me) recently had a baby shower, and I decided I wanted to make her a present myself!  I've always thought baby crafts looked like so much fun to make, but I've never attempted one.  Until now! :)

I found a number of tutorials online for portable changing pads that rolled up to look kind of like an over-sized clutch.  I thought they were pretty cute, and definitely something a new mom could use.  Most importantly, the instructions looked easy enough that even a novice seamstress like me probably couldn't screw it up too badly.  So I decided to give it a try!

I basically followed this tutorial from Small Fry and Co., except that I only rounded the corners on one end, and instead added a pocket at the other end like in this tutorial from Cluck Cluck Sew. 

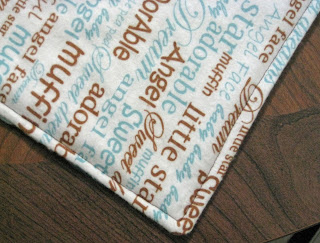
I used a patterned cotton for the outside, and a nice soft flannel for the inside, with organic cotton batting in between.  I'm sure the tutorials I linked to above do a much better job explaining how this is done, with nicer pictures than my camera is capable of, so I'll just give a quick run through of what I did.

The first step is to lay your fabrics out, right sides together, with the batting on top.  Trim to your desired size, round the corners if desired, and pin everything in place.

Sew around the edges, except leave one section unstitched (a little wider than your hand).  If you decided to round your edges, clip the corners.  Then turn it right side out and press the edges flat.

Make sure the edges on your unstitched section are folded in.

Fold the pocket up, pin in place, then top stitch around the entire edge (this will help keep the batting in place).

The final step is to add the velcro closure.  If I was going to make this again, I'd use a bigger piece of velcro as my little piece didn't seem super secure.  But anyway, in order to decide where to place the velcro, you need some idea of where the flap will hit when the pocket if full of diapers and things.  I don't have any diapers, so I just used some wash clothes and estimated how big it would be.

I pinned the velcro in place, sewed it down, and that's it!  Pretty cute, no? :)